It all started with this.....

It all started with an antique quilt given to me by my Uncle Cliff in 1985. It was made by my Great Grandmother using original fabrics spanning from the 1860's to the 1930's, in a string quilt pattern. All strings were hand pieced. All fabrics were loved. I can imagine Grandpa's shirts, or Grandma's housedress or apron. And now I'm the fortunate steward of this wonderful bit of family history........all made by hand.

Wednesday, August 27, 2014

Quilt As You Go.....or QAYG

I came home from retreat last fall with 10 ‘Buddy’ blocks from a block challenge we began the previous year.  Each of us distributed the same fabrics to each member; they in turn were to create a block using our fabrics plus fabrics from their stash based on our direction.  We left with a full year to complete the quilt, making sure we show up with a finish project next month.  Or that was the plan…..

I began to panic because somehow or other time slipped away and I hadn’t done a thing with those blocks since I tucked them away just before Christmas.  As soon as I got home I sewed two more blocks so I had 12 to work with.  Monday I saw the sand in the hour glass running out, so I got busy. 

This was a perfect project to test out the QAYG technique, or Quilt As You Go.  It allows you to machine quilt each block one at a time then attach them.  The tutorials and you tube videos made it sound super easy, each having their own ‘how to’ variations.  Well, they made it look a lot easier than it was.  First, several of the tutorials showed sashing that was not aligned, some off quite a bit.  I would need to figure out how to avoid this before I sewed a stitch.  Second, each of the blocks I received were off slightly, meaning they were over or undersized from 12.25” to 12.75” (instead of 12.5” exactly), or done on an angle that didn’t work for this layout.  But……here we go!

First here is the list of supplies I used:

1 – 12.5” square plastic template

1 – 45MM rotary cutter, with new blade (key!)

24” long quilter’s ruler

1 twin size Hobbs Heirloom wool batting (I liked the soft loft)

12 "Buddy" blocks

White fabric for backing/sashing

Dark Green for front sashing/binding

1 roll HEAT PRESS fusible batting tape

Elmer’s School Glue stick, disappearing purple (so you can see it until it dries)

Flat head pins

Scissors and threads


1.      Cut 1 - 14” squares of batting and 15” square backing for each block.  Layer quilt block, batting and backing in a sandwich, press.  Carefully pin, then machine quilt each as desired. Trim threads.  The top block may shrink from the machine quilting, but this will be covered by your sashing.

2.    CAREFULLY and precisely square up each block using the 12.5” square template.  Using the template ensures you have a perfect square each time which helps align and connect them as you go. After squaring, the batt/backing corners should match up and the side should align perfectly, regardless of the size variation in the initial blocks.  Take your time, as this step determines how successful your end result will be. 

3.     Lay out your blocks as you plan to assemble. 

4.    Cut enough 2” x full width strips from your front and back sashing fabrics to make 1” binding tape to connect your blocks.  There are several quick ways to do this….1) press using a binding tape tool if you have one, or 2) using 2 long pins, create a 1” channel on your ironing surface and pull your tape thru, leaving the iron in place so you can adjust as you pull.  This is very fast once you get the hang of it.  Set aside.  Use a pressing cloth underneath the iron if you're worried about scorching your surface.


5.     Next assemble one row of blocks at a time.  I connected three blocks, using two sashing strips.  Working with the blocks face up first, align and butt together as close as possible.  Carefully center a ¾” strip fusible heat press tape over the seam.  Press according to instructions. The photo shows the backside so its clearer.  Next run a line of purple school glue down the center of the fusible heat press tape then center the sashing piece on top, press to set.  The purple disappears once dry. Repeat on both seams then gently flip blocks over and repeat on back side. Carefully pin in place on the face, making sure to catch the bottom. Topstitch from the face side, catching both top and bottom sashing strips.  Trim threads.


6.    Once you have a row of blocks sewn, trim the excess sashing using your rotary cutter and ruler.  Make sure this line is perfectly straight, as you will be butting it up to another row. 
7.     Once you have two rows done, connect them using the same process.  BE SURE TO ALIGN YOUR BLOCKS/ROWS SO THE SASHINGS MATCH!  And so sorry for the unpleasant shadow on the right side......you should be looking at the connecting sashing and layout on the left anyway.


8.    Repeat these steps with each row until you have the entire quilt assembled. 

9.    To finish I made my favorite standard binding and finished as normal.  I know this would get easier the more I do it, but I’m pretty happy how it turned out.  The only down sides are 1) it doesn’t have a true border, but I could figure that out in the future, and 2) because of the variation in block sizes I lost some of my points.  Oh well, as a friend says…..if you can see that while driving by at 20 MPH, then you should change it!

Saturday, August 23, 2014

MODERN Quilt or ART Quilt ????

He who works with his hands is a laborer.  He who works with his hands and his head is a craftsman. He who works with his hands and his head and his heart is an artist.” ..... St. Francis of Assisi 

I mentioned the AQS show had a lot of Modern quilts in my last post.  So many I’d like to spend a bit more time understanding this emerging group, and how it compares and contrasts with Art quilts.

In my mind (or IMHO) there are three distinct quilt categories – TRADITIONAL, MODERN, and ART.  It can be said that all quilts are an art, however not all Modern quilts are Art.   Confused?  This is where I think the lines blur so let’s take a closer look at each group.

TRADITIONAL is what we think of when looking at our grandmothers’ quilts, the tools used, and styles in general.  Most have recognizable patterns and names that have been passed down thru generations.  They may be pieced or appliqued by a variety of methods. They may be constructed in a wide range of fabrics and colors, packaged in a ready to go kit or yardage bought for an exact cutting list and a precise list of instructions. These quilters see a finished sample and want to recreate it…..sometimes exactly or with a few minor twists, perhaps through a BOM (block of the month).  Some are still hand quilted, but many are long armed. Many lucky recipients have been gifted these wonderful treasures commemorating a graduation, wedding, or birth, or as a memorial. Sometimes they are used, often they are displayed.

The MODERN movement requires a bit more research.  From the many articles and books I’ve read on the MM, there are some predominant factors that seem to underscore its growth.  First, a good share of these quilters are younger/30-40 something’s, they did not have HomeEc or 4H growing up, have little or no sewing experience, and are very busy with children and careers, and have less money.  They are curious about quilting and the needle arts, but want quilts they can wrap up in, watch TV with, put in the laundry, just like our predecessors did.  Remember our grandmothers who quilted using leftover clothing scraps because they couldn’t afford new?  These were functional, and necessary.  Perhaps the younger quilters are turned off by the showcase quilts we spent hundreds of hours making but you can’t touch. These MM quilters want organic, uncomplicated quilts they can throw together quickly, and wash.  Sure, they want them to be beautiful and cheerful but they don’t want fussy points or difficult techniques.  They want simple construction, floating patterns that can go together quickly.  They like machine quilting for durability, but just enough so the quilt doesn’t get too stiff. 

But here’s where the lines begin to blur between MM and ART quilts……and a lot.  Often MM designs are asymmetrical, use intuitive cutting or improvisational piecing, trendy color combinations and graphic prints, or lots of solids, greys and whites, consisting of simple or geometric shapes, with little repetition, or traditional patterns reinterpreted.

Although most of these explain ART quilts too, the desired result comes from a different place.  The ART quilts comes from an inner need to express one’s self. The approach begins with inspiration.  The techniques used are similar to those used in a fine oil painting (representational or abstract) or sculpture.  The artist considers how the design will convey the movement, feeling, or message they want to evoke. The quilt artist gives great thought to space, light and movement.  To my mind (again, an individual interpretation) ART quilts are like paintings using fabrics and threads as your medium.  Perhaps it’s the difference between a nice restaurant that does a good job with a modern menu, and the ‘foodie’ restaurant with incredible finesse, attention to detail and artistic presentation.  Both feed you, but one can be transformational.

After all consideration, it’s clear both categories have evolved from the inspirations of previous generations seeing the influence of the functional and free style of Gee’s Bend African American quilts or Amish color combinations, both which are recreated time and time again today.  We may consider both of these ART quilt categories, interestingly enough that both grew first out of necessity and function.    

So the next time you look at a MM or ART quilt, consider which one fits best.  In the end, both are vital to be passed down to future generations, as important needle arts categories.

Thursday, August 21, 2014

American Quilters Society Show.........


AQS Show Grand Rapids, Michigan, August 20-23, 2014

I have always loved the historical and tactile aspects of fabric, and the needle arts in general.  They provide a calming and healing component to our lives.  They bring such joy and fellowship.  Perhaps that’s why I spent 34 years of my career involved in textiles.  

Yesterday I spent my day with a life-long friend at the American Quilters Society show.  We volunteered to do bag check part of the day, but this left plenty of time to see the wide range of quilts and shop the many vendors.  Touching fabric became an integral part of the day.  I came home with three Kaffe Fassett florals for a Broderie Perse class project I am teaching this fall.

Attendance was quite steady while we were there, a good sign for the economy.  Three words come to mind to describe what is hot this year…..Swarovski Crystals, art quilts and heavy machine quilting and taking a back seat this year……traditional and hand quilting.  A special nod needs to go to the 120 foot long QUILT OF BELONGING,  a moving tribute originating from our Canadian neighbors to the north.  It’s inspiring to see the range of quilts, each of them a work of art worthy of our attention.  What inspired them?  What is their skill level?  What’s their next project? 

My heart still yearns for the sight of seeing ladies seated around a quilt frame, their quilt sandwich careful stretched taut needles threaded gliding lyrically in and out, over and under, painstakingly creating those perfectly sized quilt stitches.  Those days are becoming foggy memories, replaced by women standing at the massive long arm machine, working alone creating beautiful and perfectly matched stitches.  The support and relationships built off those earlier frames are replaced by technology, where the only relationship built is with the mechanization of the stitch, in many cases carried thru a cord from a computer to the fabric.

Shoppers spent good money on the latest patterns, templates and die cuts, speeding their process along in perfect harmony.  This makes me pause…..I think of my grandmother, cutting her templates from cereal boxes, hand piecing her perfection from the irregularity of these rudimentary tools.  How did these original quilters achieve such incredible results with such primitive tools?  It’s the same feeling I get when I consider how the pyramids were constructed.  Pure amazement!

It’s been said that fabric heals.  Yes, in the literal sense we have put bandages on wounds throughout time.  But fabrics or quilts in this case heal our spiritual aliments.  They sooth and comfort like nothing else.  When we tire we crawl into bedding. When we’re cold we grab a blanket or quilt. When we are sick we return to our bed and the comfort it provides.

I returned home filled with many ideas, quickly capturing the essence of each in my sketch book.  My studio is settled now, so there should be ample time to quilt as this fall and winter approach.  I have housework to attend to now, but afterwards I will settle in my studio chair, turn on some nice music, grab a quilting magazine and most importantly, wrap up in a nice quilt. 

Tuesday, August 19, 2014

What do peppers, a rainy day and a bunch of orphan quilt blocks have in common?

Nothing really, I just needed a reason to share a picture I took of the wonderful peppers at the farmers market last week.  They were spectacular…such vibrant colors, all shiny and fresh from the field that I couldn’t resist.  The farmers market is always ‘eye candy’ for creative types, with all its color and texture.  Who can resist?!  I see a quilt in these colors, don't you?
 
But the orphan quilt blocks and a rainy day are connected.  Today was the perfect day to finally get them sewn together for a small quilt, perhaps for the local Neonatal unit.  Several years ago, I made two matching full size quilts for our twin beds.  I made them full size plus so they would hang over the sides without needing dust ruffles.  This made them harder to match each block placement EXACTLY, but it was well worth it.  They look great in the “Swans Island” guest room.  I ended up with a bunch of leftover blocks and made bed pillows. 
 

I still had left over blocks so today I got busy.  I reconfigured them into 4 triangle blocks instead of two.

 
Working from the design wall I pieced the new blocks and then rows together to make a 32” x 42” baby quilt top. 
 

I still have some left, and those will be made into coasters to sell at our church bazaar this fall.  I think I flushed out the last of them!  Either way, as I’ve said before……I’m sew happy when I can spend time in my studio!

Friday, August 15, 2014

I'm in a jam!


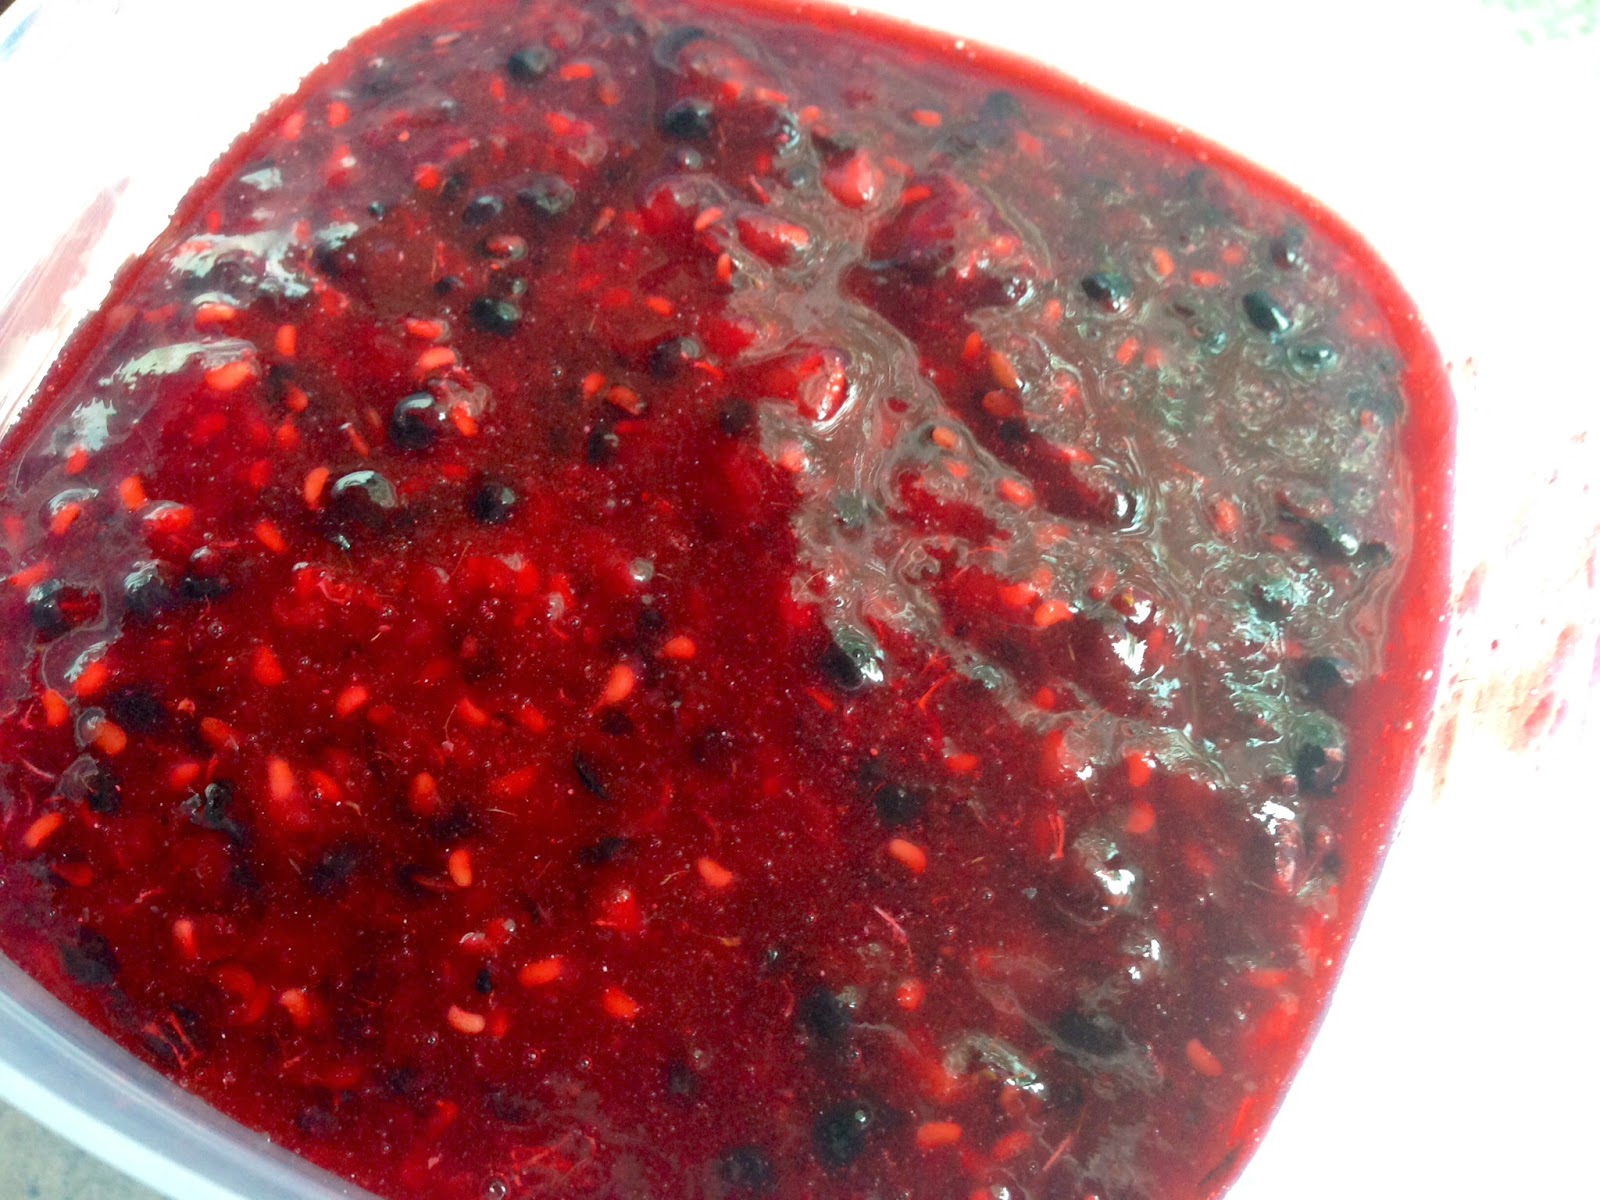
Blackberry and Raspberry freezer jam to be specific.  Here’s a quick recipe recap:

1.      You’ll need 24 oz. fresh blackberries and 24 oz. fresh red raspberries, rinsed and drained, 4 T. Ball instant fruit pectin, 1 ½ C. sugar (I used a bit less than the pectin recipe called for this much fruit), and freezer containers.


2.    Mash the berries with an immersion blender or hand masher.


3.    Add the pectin and sugar, stir thoroughly until everything is blended and there are absolutely no lumps anywhere.  Let sit for 10 minutes, stir again.


4.    Pour into 2 C. freezer containers and pop on the lids.  Let sit on the counter for a couple hours to be sure they are beginning to set and the fruit juice thoroughly melts the sugar.  Pop into the freezer to enjoy on toast, biscuits and ice cream later.


5.     Yum!  There is nothing better than freezer jam.


Wednesday, August 13, 2014

How to make a purse to wear under your choir robe......

TUTORIAL ….…..

A friend needed a light way, discreet crossbody purse to wear under her choir robe to carry keys, lipstick, driver’s license and an occasional tissue during cold of allergy season.  She was using a seriously shiny gold lame purse, but she felt she needed something a bit less, shall we say…..risqué since it WAS for church use.  LOL….

So…she picked one of my leftover light weight upholstery fabrics (from my previous life) that still had some heft.  I bought 42” long web handle and a 9” zipper, pulled coordinating linen from my stash and off to the Bernina to begin.  My tutorial is rather simple, but here it goes.


1.      Cut 2 each 7.5”x11” outer fabric and lining fabric pieces.  Lay the outer fabric face up; lay/align the zipper on top so the pull is face down, then the lining piece face down on top the zipper.  Pin carefully and sew about ¼” from the zipper teeth.  Repeat on opposite side of zipper with remaining two pieces of fabric. 

2.    Press both sections away from zipper. Top stitch if desired.

3.    Pin handle on one end of the zipper so the handle lies over the zipper, sew across a couple times to secure.  Repeat other side, making sure the handle isn’t twisted.  Using a binder clip or rubber band, secure the handle so it’s out of the way for the next steps.


4.    Next gets a bit tricky.  Open the fabric up so the outer pieces face each other, and the lining pieces face each other.  BE SURE TO OPEN THE ZIPPER PARTIALLY at this point…..or you won’t be able to open it later.  Pin carefully.  Sew around the outer edges leaving a section wide enough to get your hand in to turn the bag inside out.  Make sure the handle doesn’t get caught other than where it’s already sewn.  It’s tricky and will be bulky where you sew over the zipper.  Take your time.  If your machine has risers use them.


5.     Trim corners before you turn inside out, being careful not to get too close to your stitches.  I might re-sew this area to be sure it’s strong….to be safe.

6.    Turn inside out.  Pin the area and top stitch very close to the edge to secure, or feel free to hand whip stitch.


7.     Voila!  Off to church she goes! 

Tuesday, August 12, 2014

Round Robin Rally

My friend Denice posted a lovely tribute recently about 8 quilting friends that completed a Round Robin with a similar group of ladies in Germany.  Denice organized our US contingent, and I was asked to participate in this last fall.  Even though I had a few reluctant and overwhelmed moments during the process, I am so very glad I did. 

In short, a round robin quilt is made by a group of quilters where one person makes a center block, and the other quilters add borders one by one.  The original quilter doesn’t see the quilt until the last border is added.  They may finish as is, or decided to add to it, depending on the rules or finished size desired.  We chose to keep the finished quilt to 4 borders keeping it on the smaller size.  Even then, if 4 people add 8” borders, you still end up with a pretty big quilt to finish. Each of us had 6 weeks to complete our border before passing it on to the next……sort of like musical chairs for quilters.

Denice hosted the unveiling at her home so we could meet the quilters we hadn’t met in our group yet, and see all the finish tops together one last time before she shipped them off to Germany.  We saw photos of all the center blocks at the beginning, but since each only added 4 rounds, some of us hadn’t seen the progress and final result.  What a wonderful range of ideas! Interestingly one of our gals noticed we sent them almost all hand applique blocks whereas they sent us mostly pieced.

I can’t show the quilts yet since they haven’t received ours yet, but I’d like you to meet our US group of quilters.  I’ll show the quilts later, once I know they have them late August.

Sally – we knew each other back in high school, then lost track of each other, and I’m so bless to have reconnected at Janet’s house by chance about ten years ago.  Sally’s quilting skills are highly skilled and impeccable, and she LOVES tiny piecing.  We’ve made many quilt shop stops and retreats along the way.  Sally stepped in for Karen after we lost her to liver cancer in February.  I’m so happy Sally will receive the quilt made for Karen, since Sally was close friends with Karen, and responsible for bringing her into our bee.

Janet – no photo, she could not attend last week because she’s riding motorcycles somewhere in the Ozarks.  We became friends after she long armed one of my quilts, and have been good friends since.  Janet likes to switch things up, and vacillates between her engineering and artsy side.  We’ve made many quilt shops stops and retreats too….Janet always wins the ‘most purchased fabric award’.  J

Denice – I met thru Denice at a retreat in Harbor Springs.  She played ‘border collie’ to this group, patiently keeping us on track.  Like herding mice I suppose!  Denice loves loves loves hand stitching…..and has joined our retreats also.

Marilyn – I met thru Denice via Janet. Marilyn is part of our retreat also. Marilyn and Denice became quilting buddies thru the marriage of their children.  Our traditional styles and colors are probably the closest within our group, unless I’m working on art quilts.  Like Sally, her quilting is beautiful.

Ines – originally from Peru with a very (humorous) entertaining story how and why she left MANY years ago. We met thru our bee, joining us on retreats as her busy life allows. I love the Peruvian design and color influence she brings to her unique designs.

Dodie – my first time meeting Dodie who is a beach/quilting/neighbor friend to Denice.  She luckily missed all our snow last year since she winters in Florida. She loves the modern quilt movement and is not afraid of intricate and complicated piecing.  It was lovely to meet her finally.  I passed one block off to her, which nearly had to be replaced after I got my wires crossed and sent the block to the wrong address.  Lets just say the quilt is 'well traveled'.  Whew!  Crisis averted…..

Jan – my first time meeting Jan too.  She is a quilting friend/relative of Denice, who loves all handwork, and does beautiful detailed applique and embroidery.  Jan belongs to several local guilds and bees, so I hope I will run into her in the future.


Barb - yes, this is me. Denice post says I'm "incredibly talented and very funny" on her blog. LOL......I have her fooled!

These women do AMAZING work! We were asked to write something about ourselves or what inspired us about the round we did in the quilter’s journal.  This will give them a little insight into our lives, and build friendships between us.  Yes, I worked on four quilts, and yes, I will get a quilt at the end, but to me the most important thing is the 16 people (some old friends, many new) I have a bond with, and some great memories of the process……and the quilt too.

Stay tuned for all the quilts once we get theirs.  

Tuesday, August 5, 2014

Happy Campers at Camp Chloe

This past weekend we hosted 14 of Aaron’s friends from the Chicago area (and a sweet Shiba Inu puppy named Spiderman) to camp in “the forest” at the back of our property. They celebrated Chloe’s 25th birthday.  We pitched our tent, stacked wood high, set up parking signs prepping for their arrival Friday night.  More tents would follow.  Besides Aaron, Chloe, Neil, Andre, Bill, Sam, Miguel, Forest, Drew, Bojan, Kristen (+1), Michele (+1), and Lauren came for the weekend.  Sadly, Dan couldn’t be here as he is in Spain until the 16th.

Our biggest fear was rain…..since rain would drive them all inside.  Thankfully, the weather was absolutely perfect for camping……low 80’s during the day and cooling to 50’s overnight.  Gary fed the campfire continually from Friday until they left Sunday evening.  The chill in the night air was perfect for an evening campfire, and perfectly clear skies with no light pollution to enjoy star gazing.  They counted 7 shooting stars total.  We are so very fortunate to live away from the city lights, so close to Lake Michigan to enjoy the night sky. They visited several nearby beaches, took in the sights and shopping in nearby Saugatuck, and some antiquing. 

Saturday morning we set out coffee, banana bread and pig in the blankets to get them started….and I surprised them with a carrot cake for the birthday girl.  Sunday we provided brunch – coffee and orange juice, scrambled eggs, sausages, fried potatoes and fresh blueberry muffins.  No one should have left hungry.

It was a good weekend and a pleasure to meet Aaron’s friends, some he met at SAIC, and some later….but all in the arts one way or another.  And all very nice young adults welcome back anytime.  The last car pulled away just before 7:00 PM Sunday evening.  We put the last few things away, started the laundry from all the showers, locked up.  We slipped into bed early, exhausted……..PS, in case you can't find him, Aaron's the one wearing the Chloe Seibert t-shirt.
Happy Campers!

Monday, August 4, 2014

Wild Blackberry Pie.....


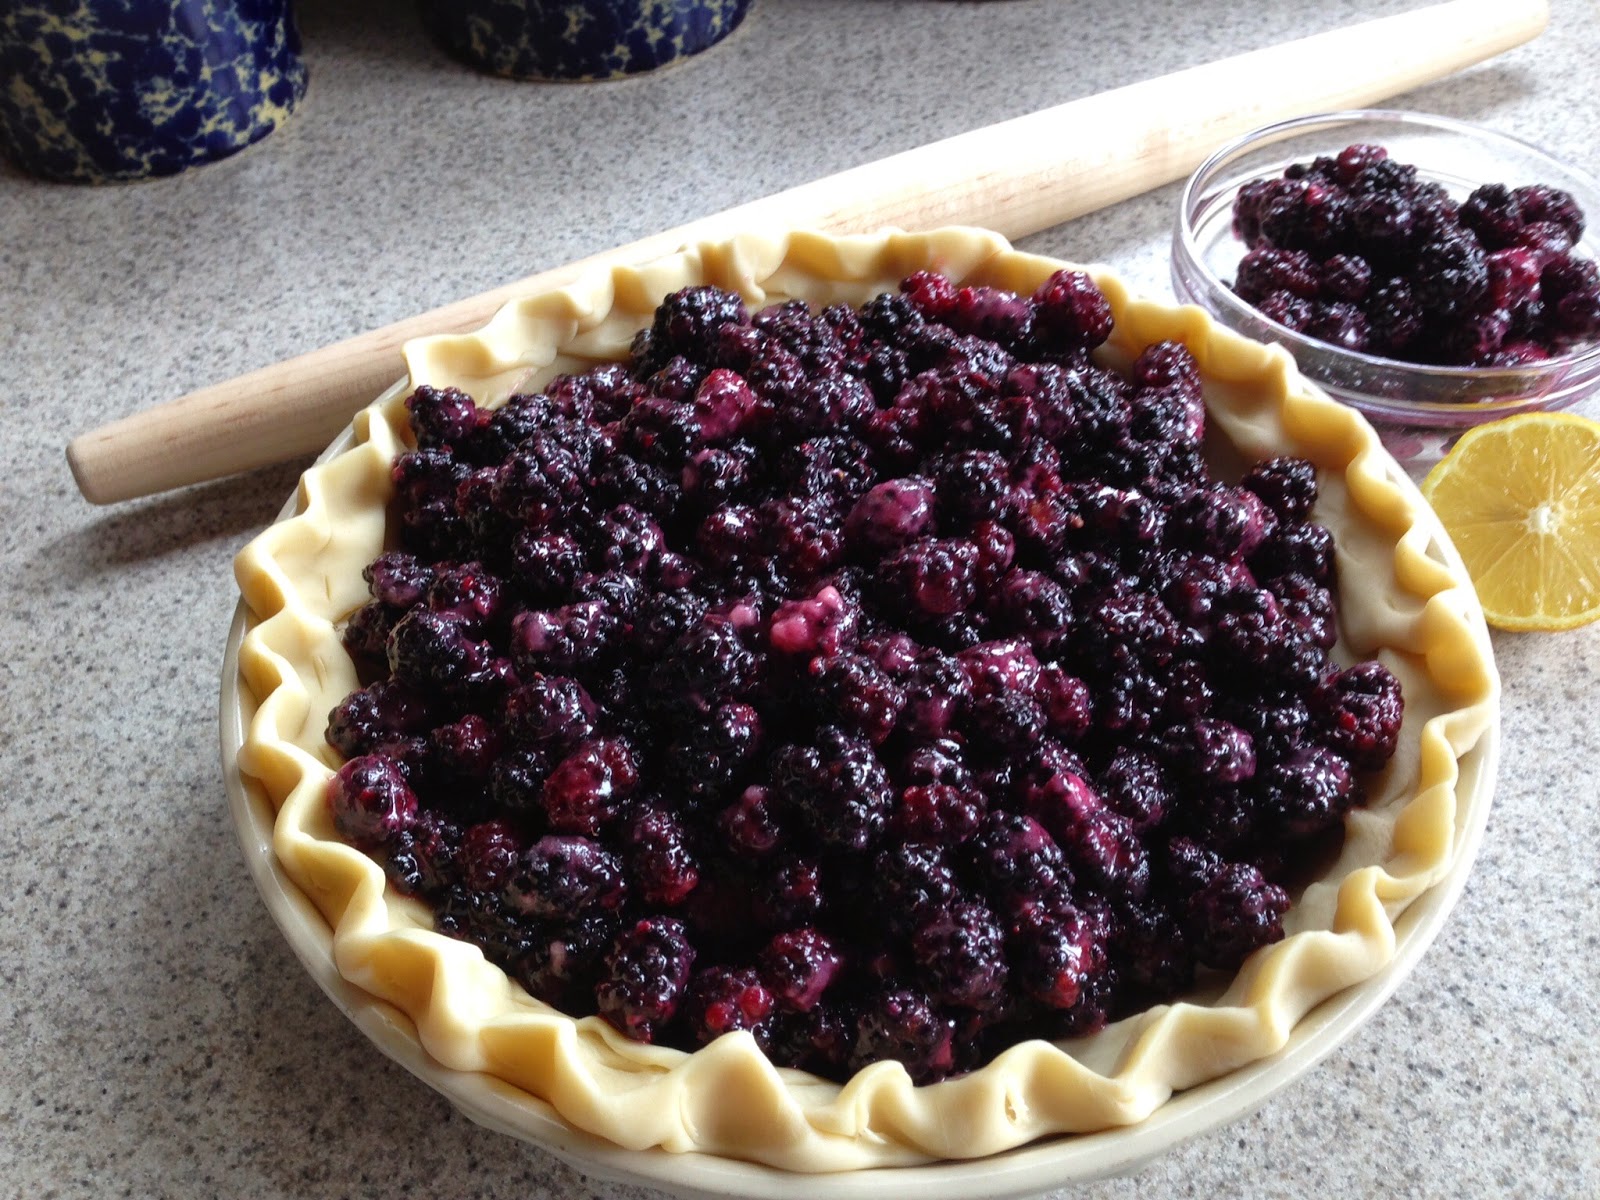
The wild blackberries are ready to pick, in spite of the unseasonably cool summer we've had.  They aren’t quite as big as years past, but I’m not too concerned.  I have every hope they will make a wonderfully juicy and rich pie.

Summer growing can yield so many happy surprises, especially to someone like me that does not possess a green thumb.  To many, actually to the vast majority of you folks, you’d be thinking….”what’s the big deal?”.   Even the slightest success is reason I celebrate.

So out comes the pie pan, pastry rolling pin, and all the ingredients needed to make a sweet, juicy pie.  A bit of sugar, a little flour for thickening, a dash of cinnamon because it makes everything better, and a squeeze of fresh lemon, tossed with a heaping half gallon of wild blackberries then into the pastry crust.  Top it off with a crumble topping made of oatmeal, brown sugar, butter and flour and pop it into the oven to bake. 

The hard part is always waiting…..waiting nearly the hour for it to bake, then waiting for it to cool which allows the juices to thicken slightly.  But the consensus is…..the wait is always worth it.  Top it off with Country Dairy Grandpa’s Vanilla Ice Cream and you’re sweet tooth is happy and content.  Summer has paid you well.