Some of you asked for more details about the ‘quilt
as you go’ process. This technique is
new for me too, although I’ve known about it for some time so I’m happy to pass
along everything I’ve learned so you can avoid problems. It’s a nice low cost alternative
to long-arming, or machine quilting a cumbersome piece in a standard size sewing
machine.
Lately I’m in my wonky intuitive piecing mode, a
lot of cutting and slashing as one of my friends call it, but basically just
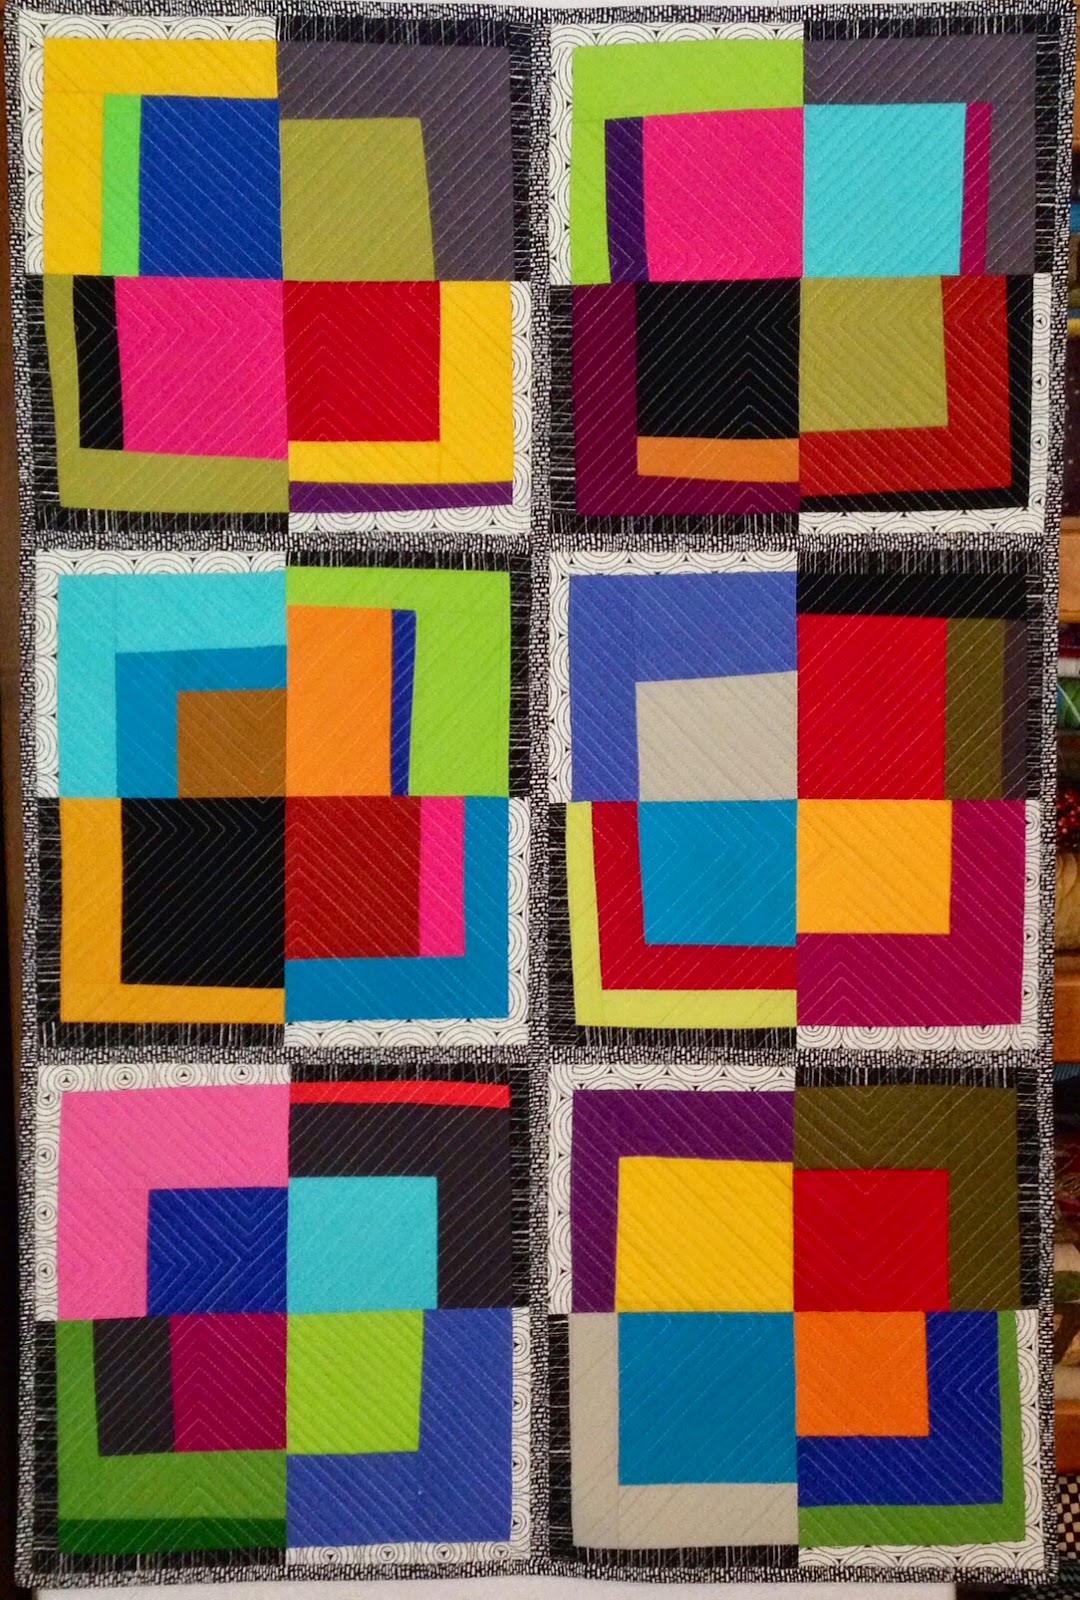
easy no fuss creative time. This piece
is called BOXED IN. We can skip over the
piecing steps because you know how to create quilt blocks. Right?
Right. Recapping the items I used
for this QAYG project:
Quilt blocks
Sashing and backing fabric (see notes below)
Batting (I used Hobbs Heirloom Cotton 80/20 for
this)
Long pins
Heat Press Batting Tape (fusible)
Glue sticks (I used Bohn narrow purple glue
stick for the narrow sashing)
½” wide bias tape tool (option - my finished strip
is very narrow)
Thread (I used a Aurifil Mako 50wt variegated neutral gray)
Long rotary cutter ruler (I used a 24" long)
Long rotary cutter ruler (I used a 24" long)
Large square temple (I used an Omnigrid 14”)
Rotary cutter
Cut your batting 1” larger than your block and
your backing 1” larger than your batting.
Center your block, batting and backing, and then press the layers to
temporarily fuse. Pin to secure. I used a top stitch needle 90/14, Aurifil
in the top and bottom, set my stitch length to 3.00. I used my Bernina #1 standard presser foot, using the
edge as my echo quilt guide. Using the triangle edge of any large size temple, I marked
a triangle on one side from the corner.
It didn’t go the full length of the side, as I wanted irregular line
placement, but that design element is up to you. Begin stitching from one corner, with the
foot down pivot, and continue stitching to the edge. Once you have the first line, use the edge of
your presser foot to position your next stitching line. Continue to echo quilt
working towards the edge until you have the entire space filled in. Draw another triangle from that edge and
repeat the steps until your entire surface is filled. Easy peasy!


You can be creative how you want to machine
quilt your blocks but the easiest is echo quilting. This example was irregularly echo quilted.

You can also echo quilt using the presser foot in circular stitch motion, as shown in these examples.

Next, square up your blocks perfectly, and I
mean as accurately as you can, all the same size. This step is important, the more exact you cut
each quilted block the easier it will be to assemble them, with your sashing
meeting at the center. Both pictures below shows they are exactly the same top
and bottom, the intersections meet perfectly.
You can adjust a little by tugging, but this will affect how flat your
quilt hangs so avoid as much as possible. Best to take your time here….


Next I wanted a very narrow sashing this project,
barely capturing the blocks. The finished
width is ½”, so I cut 1” strips. Use a pin to nudge the fabric thru the tape
maker, then place your iron on top of the strip and carefully pull the fabric
thru. For extra-long strips sew them together before making the tape.

Assemble your blocks one row at a time. Cut enough batting tape strips to secure the
entire front and back. I cut my strips
just under ½” so my sashing will cover it.
Start with two blocks face up, make sure the ends meet perfectly and carefully
center the batting strips over the center seam, press to fuse.

Next gently run a line of glue stick the entire
seam, and carefully center the sashing tape on top so it covers the batting
fusible tape. Press to set. Carefully flip over without losing the connection. Repeat the fusible, glue stick, and sashing
steps on the backside, then pin to secure.
The photo below shows the sashing strips match top to bottom.

From the
top, stitch close to the edge on both edges, then trim ends exactly. Your blocks
are now securely connected. Repeat steps until your row is connected. Make sure the connecting edge is perfectly
straight. Repeat process for all rows.


Align two rows by repeating the batting tape,
glue stick and sashing steps, including the sewing. This is where all the careful cutting and
matching pays off. Trim any edges and
finish by adding your sashing. You’re
done! Feel free to refer back to my August 27, 2014 post for more information.
The beauty is a lovely machine quilted project without sore shoulders and backs, and no expensive long arming. I’m not saying this is for every project, but I will consider QAYG for all future projects.
The beauty is a lovely machine quilted project without sore shoulders and backs, and no expensive long arming. I’m not saying this is for every project, but I will consider QAYG for all future projects.
Happy QAYG Quilting!
No comments:
Post a Comment