It all started with this.....

It all started with an antique quilt given to me by my Uncle Cliff in 1985. It was made by my Great Grandmother using original fabrics spanning from the 1860's to the 1930's, in a string quilt pattern. All strings were hand pieced. All fabrics were loved. I can imagine Grandpa's shirts, or Grandma's housedress or apron. And now I'm the fortunate steward of this wonderful bit of family history........all made by hand.

Tuesday, August 2, 2016

Back to the art barn

I made another trip to the ART BARN.  This time my art buddy was my dear friend Kimi. We decided to do ceramics. There are soooo many pieces to pick from....you could create your very own complete one of a kind dinnerware set. Not today though. Today we decided to do something a little simpler.  We picked our pieces, then our finishes, then some quick instructions and off to work we went!

Kimi picked a HUGE piggy bank and a bowl for rings for her new bedroom. She also did coffee mugs for her folks, with their Czech names on them.  How cute they were! I did a utensil holder and mug for my paint brushes.  I broke my toe recently, so I stepped away from the sewing machine and instead I’m busy painting like a crazy women......and loving it I might add.

We had a great time! And the time ticked by quickly. What a great place to chat, create, and enjoy time together, without technology, only hand crafted entirely by hand. I look forward to going again soon. 


Tuesday, July 12, 2016

Play all day at The Art Barn!

This last week dear friend Kris (who now lives in South Carolina that I've known since middle school) stayed at my house. Her brother was getting married over the weekend so aside from a few family obligations we had plenty of time to catch up. I was her plus one at the wedding….also great fun seeing her little "platinum" brother (back in the day) tie the knot.  All good…..

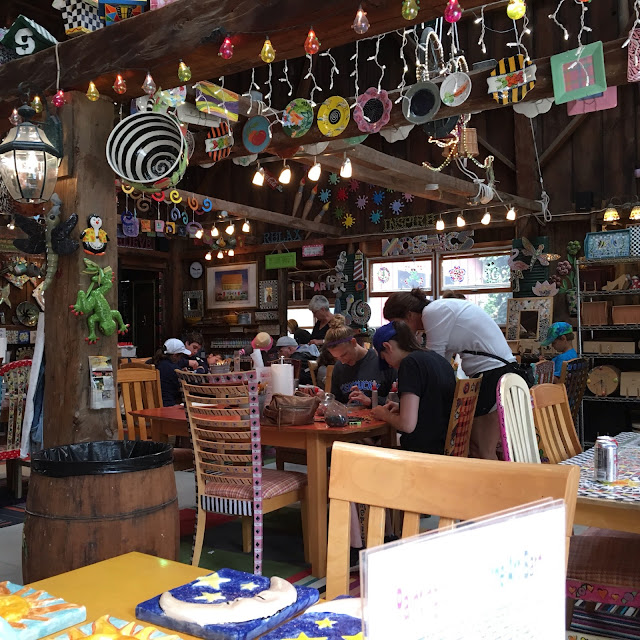
One day we ventured to a place in Douglas called THE ART BARN.  The property was overflowing with colorful daisies and cone flowers in the abundant gardens. Whimsical garden ornaments, ceramic frogs, birdbath and bird houses, and flags caught our eye at every turn. Everything was bright and lively, each thing enticing you inside. The grounds even included an old fashioned elevated water tank with brightly colored tulle petticoats hung over the side implying naked bathers were enjoying a cool dip.  

We arrived shortly after 10:00 and the place was already packed. For an $8 studio fee, we could make things all day, at least from 10-6. Prices for the base items were reasonable, and included all the supplies and tools you need to leave with a finished item. The clock included an installed mechanism; a lamp was ready to hang a shade and screw in a bulb. You leave your items for firing or finishing and pick up in a day or two. Their tools and your imaginations, from painted ceramic plates and bowls to jewelry to mosaic tiles to painted silk scarves. 

The hard part was deciding what to do. A mosaic, or a necklace or earrings or both?  We kept being drawn to the glass fusing. The round and square brightly colored garden stakes were simply too beautiful to resist. But the shaped glass bowls and platters were incredible too. It took us forever to decide. I finally settled on a small clock and Kris picked a sun-catcher...both good starting projects.  They were big enough to master the skills and challenge yourself yet small enough not to be overwhelmed. Carol the owner gave us the basic instructions how to snip the glass, do overlays and fill in, then we were on our own designing and creating.  Then our projects were placed in queue in the finishing room.

Sunday afternoon we returned to pick up our projects. Both of us were very pleased with our debut projects, and agreed we need to return to attempt something more daring now that we have our first project behind us. I'd like to do a couple lamps and both of us would like to do a large garden sun-catcher. All Kris has to do is plan a return stay during the hot summer! Tick tock!!!


Friday, July 1, 2016

Happy Red, white, but no blue!!

So what is that supposed to mean? Red, white but no blue? Well, we are about to celebrate our national birthday Monday July 4. It's hard to believe we are 240 years old! I have my flags and banners and other patriotic items scattered around the house. This weekend I'll will begin my annual ritual binge watching HBO's historical docu-drama ADAMS. Love it....all 8 hours. John Adams and Thomas Jefferson seem like old friends. Hopefully our democracy will still be in tack come this November.

So why no blue? Well you may remember a post about a year ago where I showed a collection of red fabrics I auditioned for a quilt guild challenge. I showed the white background, the 110 yards of skinny vines I made. I worked on the quilt over a year, all hand appliquéd. Then it went to my long armer Janet H. so she could add her magic. Then I added the binding and label.  This past Monday our guild had all the quilts displayed and a certified quilt judge selected winners in 4 categories, and the members voted for "viewers choice".  So 5 awards total.  So I'm not blue.......I won 2 of the 5 awards. Small art/modern and viewers choice. I have to say the viewers choice is most important to me because it's from my fellow quilters. Not that the judge award isn't nice, it's just different. Anyway.....I entered 4 red and white quilts....here they are:

VIEWERS CHOICE/Large Traditional: title Leaves/825+110+2+42+12

BEST SMALL ART: title Lives Lost

Other Small Traditional: Robby Peter to Pay Paul

Other Small Art: title No More Red!

All the winning quilts together:

My winning quilts:


Wednesday, May 4, 2016


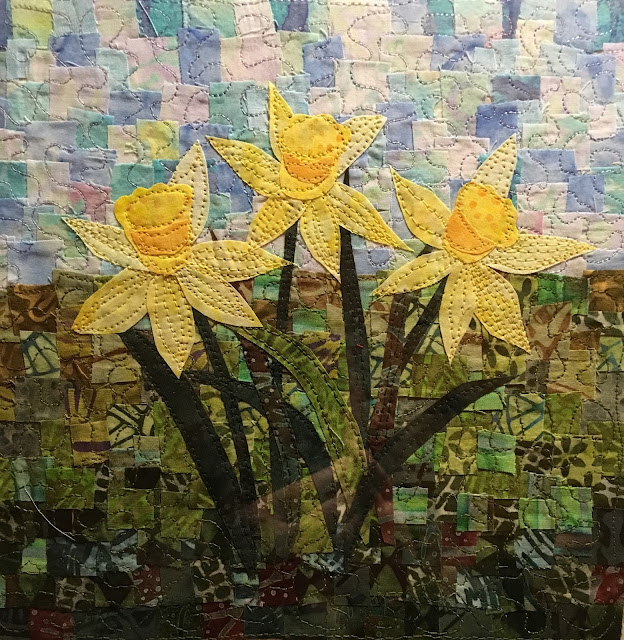
I am so loving this mosaic technique.  It's so much fun to capture springtime for year round enjoyment!

Sunday, May 1, 2016

Impressionistic Quilts

This week has been crazy busy, and crazy fun! I attended a day long workshop with 2 time ArtPrize winner Ann Loveless. She taught her "confetti" quilt techniques which she describes as impressionistic in style.

We spent the day rotary cutting fabric into itsy bitsy shards of color, then laying them onto a prepared batting into a composition, then we carefully covered the piece with black tulle. Yes the tulle they use for weddings, only black. Next...we carefully pinned every inch so the tiny bits stayed put. No one dared sneeze until the very last pin was secure. God forbid you turned an overhead fan on!!!

Then we carefully free motion quilted the entire quilt sandwich using clear poly thread, finishing with embroidery threads highlighting our design elements. The whole process was incredible free and fast. (except the pinning part.....tedious and prickly when FMQ).

I'm inspired to do more using this technique, with a few tweaks here and there. Here are the samples so far, excuse the lack of binding yet. That comes next.  Trillium Woods, Daises, Tulips, and Wild Dogwood in the Fog......